
Autumn in London hack
We love this dress and are so pleased so many of you agree as Autumn in London is proving to be our most popular pattern so far. We received some lovely feedback from customers at the Knitting & Stitching show in October and it was so interesting to hear other sewers talk about how they would adapt the pattern for their own style preferences, such as lengthening the sleeves or making a top. In this blog we will be showing you how to do both with easy to follow step by step instructions.
For this Autumn in London hack you will need:
some paper, tape, a pen and ruler; and
the Autumn in London instruction booklet!
MAKING THE NEW PATTERN PIECES
1. First we need to adapt the existing bodice and sleeve pattern pieces. To do this, first tape a piece of paper to the bottom of the front bodice pattern piece (pattern piece A). Make sure the paper is at least the width of the pattern piece and approximately 30cm long which should provide plenty of room to extend the bodice to your required length.
2. Extend the side seam and centre front lines of the front bodice pattern piece to your preferred length then extend by a further 1cm for the hem. We extended by a total of 15cm (approximately 6 inches) so the top will sit comfortably just above the hips.

3. Connect these two lines to complete the new front bodice pattern piece.
4. Repeat steps 1 to 3 for the back bodice pattern piece (pattern piece B) ensuring you extend the side seam and centre back lines by exactly the same amount as for the front bodice.

The front pleats and back waist darts are designed to add shaping to the waist of the dress. For the top no shaping is required, so there will be no need to re-mark the front waist pleats or the back waist darts as these do not need to be sewn. The front bust darts should be sewn as usual.
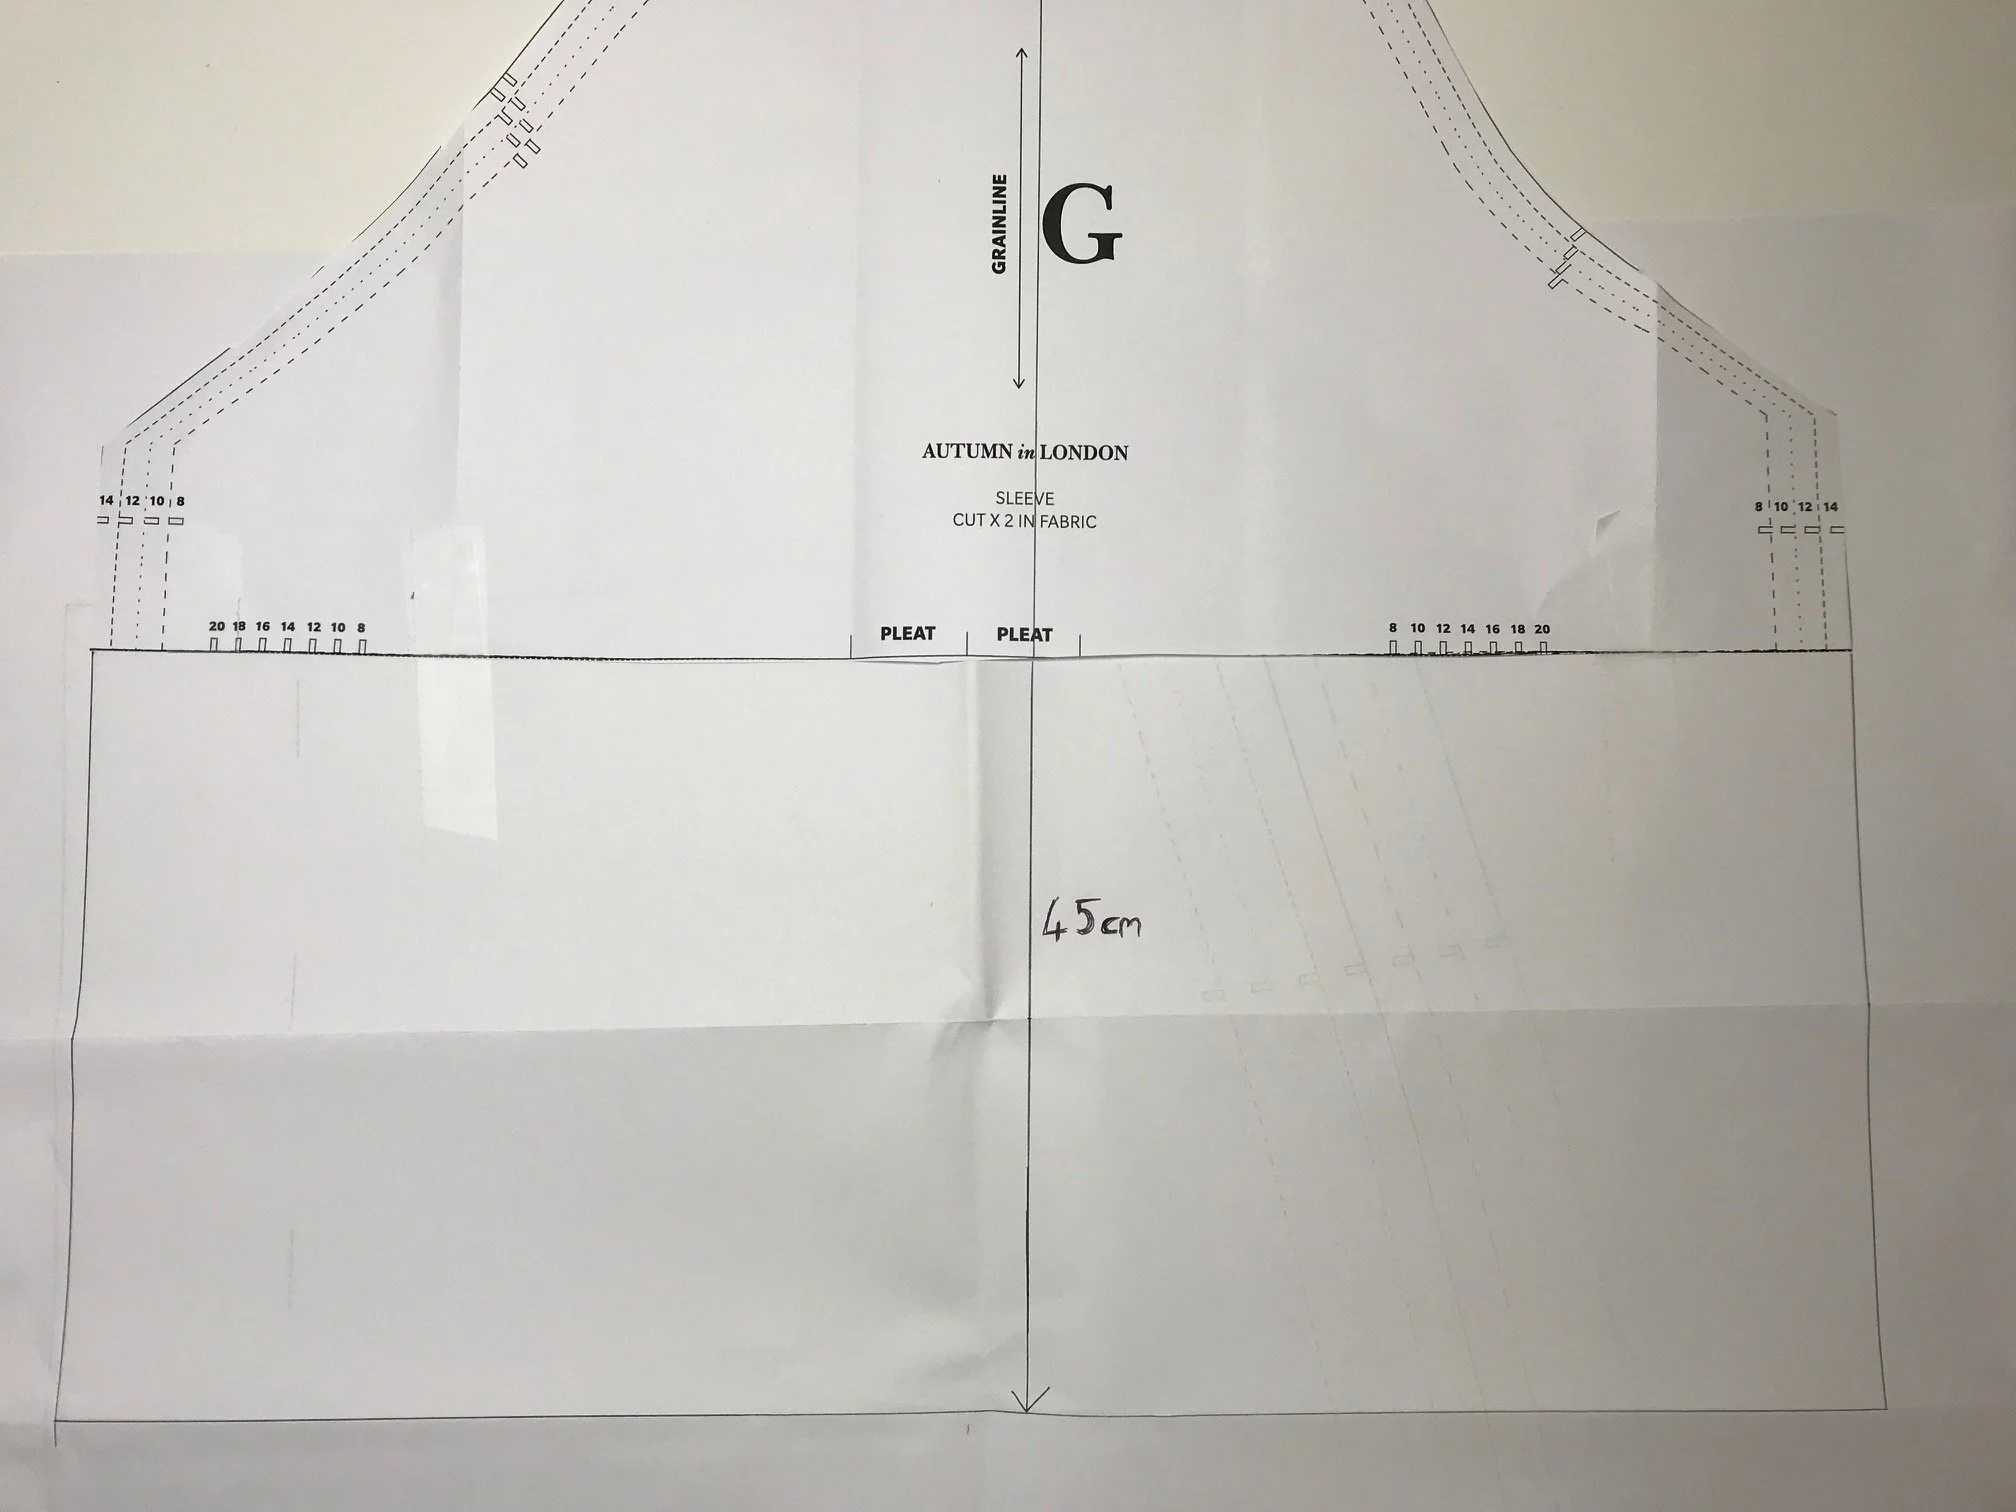
5. Tape a piece of paper to the bottom of the sleeve pattern piece (pattern piece G) again ensuring that the paper is at least the width of the pattern piece and approximately 50cm long which should allow plenty of room to extend the sleeve to the required length. Draw a line starting from the centre pleat at the sleeve head to the length you would like the sleeve to be when the top is finished and then extend by an additional 1cm for the sleeve binding. We made a three quarter length sleeve so our required sleeve length is 45cm in total (from the top of the sleeve head to the bottom of the sleeve).
6. Extend the sides of the sleeve so they finish at the same length as the line just drawn in step 5. Join the three lines together to form the new sleeve piece. In the original sleeve pattern there is a pleat at the bottom of the sleeve however what is a beautiful delicate design feature for a short sleeve will be lost in a longer sleeve length so there will be no need to transfer these markings to the newly extended sleeve pattern as the bottom sleeve pleat will not be sewn. Losing the bottom pleat will also mean that the sleeve binding pattern piece will now be too short. A new sleeve binding pattern piece couldn’t be simpler to draft. Draw a rectangle on a piece of paper which is the width of your sleeve pattern piece (the width will vary depending on what size pattern piece you have cut out) and 3.5cm deep. Your new sleeve binding pattern piece (pattern piece H) is now ready. There will not be any need to transfer the notches to your new sleeve binding pattern piece (as these were used to match the sleeve binding to the sleeve once the pleat was sewn).
OPTIONAL STEP
We wanted a slightly tapered sleeve. To do this we reduced the sleeve width (at the elbow/wrist end of the sleeve depending on how long you are making the sleeve) by measuring 3cm in from each side of the sleeve and marking these points along the bottom edge of the sleeve. Finally, starting from where the curve of the sleeve ends (the corner point shown in the photograph below), we drew a line to the newly marked points on the bottom of the sleeve to form the new sleeve width.

You now have all the pattern pieces required to make your Autumn in London top! Cut out all the pattern pieces in your fabric and interfacing and you will now be ready to start sewing.
SEWING THE TOP
7. Make up the bodice according to the instructions. As there will be no need to sew the front pleats or back darts you can skip steps 3, 4 and 5. You can also skip steps 7, 8, 9 and 10 as these are only required if you are making the dress and steps 22 and 23 as the bottom sleeve pleat will not be sewn.
8. Step 24. If you have made a tapered sleeve the sleeve binding may now be slightly wider than the sleeve. Once you have sewn the sleeve binding to the sleeve as instructed in step 24 simply trim away any excess sleeve binding that is wider than the sleeve.
9. Step 33 is amended as follows: Finish the hem of the top and turn the hem under by 1cm so the wrong sides are together and press. Hand or machine stitch the hem in place. Complete step 34 to finish the buttonholes and sew the buttons.

Congratulations, you are now ready for a variation of Autumn in London!